+46724003431

Essentially, Cisco ASA Firewall evolved from Cisco first physical appliance called the Cisco PIX Firewall which had limited VPN capabilities. Also, these firewalls had the ability to provide Remote Access VPN capabilities using basic IPSec and PPTP type VPNs.
Later, as Web-based VPNs (SSL VPNs) were becoming more popular, Cisco acquired a company called Altiga which was known for its Web VPN capabilities. The Web VPN capability along with the Firewall feature of the PIX were ported into a new device called the ASA Firewall. Moreover, Cisco ASA firewall can operate as a L3 router by default and all routing functionalities that a normal router would have. It also can run RIP, EIGRP, OSPF and BGP routing protocols.
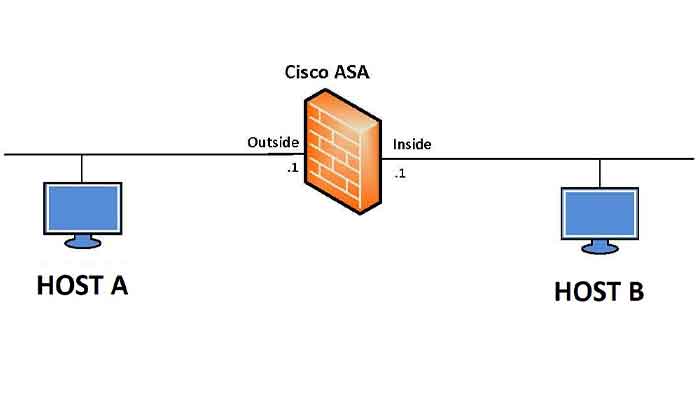
The difference between a regular router and a ASA firewall is that the router forwards all traffic by default whereas the ASA will allow traffic based on certain policies.
To initialize an ASA interface, you need the following parameters first:
By default, all traffic is allowed to flow from high security interface towards a low security as long as the routing information is in place. Although, all traffic is allowed to flow from high security level to low security level, only TCP and UDP traffic is inspected. This inspection creates a return entry in the connection table on the firewall. This allows the return traffic to come back afterward. This is known as Stateful inspection.
Cisco ASA Firewall
In the other hand, all traffic is blocked from coming in from low security interface towards a high security interface. If you want this traffic to work, you would need to create an explicit policy on the low interface to allow this traffic using an ACL. When a packet hits a low security interface going towards a high security interface, it will check the connection table first, if there is no entry in the connection table, it will check the ACL for a Permit, if there is no permit in the ACL, it will check the default behavior.
Finally, any traffic going from an interface that has the same security level as the destination interface will be blocked. Note that even an explicit ACL will not help in allowing this traffic. A typical example of this setup is when you have 2 partner networks connection into your network but you don’t want them to traverse to each other thru firewall. Also, you have an option to disable firewall between 2 interfaces with the same security level by using the “Same-security-traffic permit inter interface” command. If you use the above command, it allows all traffic between 2 interfaces with same security level.
Essentially, there are two types of traffic reaching ASA firewall, TO and THRU traffic. TO traffic is destined to an interface on the firewall and it is controlled by the service running on the firewall. Plus, ACLs have no effect on the traffic flow. By default, the only service that us running on the firewall is ICMP and these traffic are only allowed to reach the ASA and no other traffic is allowed TO the firewall. Enabling or disabling of a service on the firewall is a “Per Interface Characteristic”. Although, the THROU traffic is a traffic that is destined to the network passing the firewall. This traffics can be controlled or limited using ACLs.
By using the following commands, you can verify your configurations:
ASA# Show run interface: Displays the running config for an interface.
ASA# Show interface ip brief: Equivalent to the show IP interface brief which displays the interface IP address and status.
ASA# show nameif: Displays the interfaces, their names and their security levels.